
If you have bought our KRAD night vision digital scope or are considering buying it, this guide will be helpful for you! Each package comes with a one-shot sight-in target to easily zero in your scope. So, you will be out in action in no time after following these simple steps. Here’s how to use your KRAD scope one-shot sight-in target.
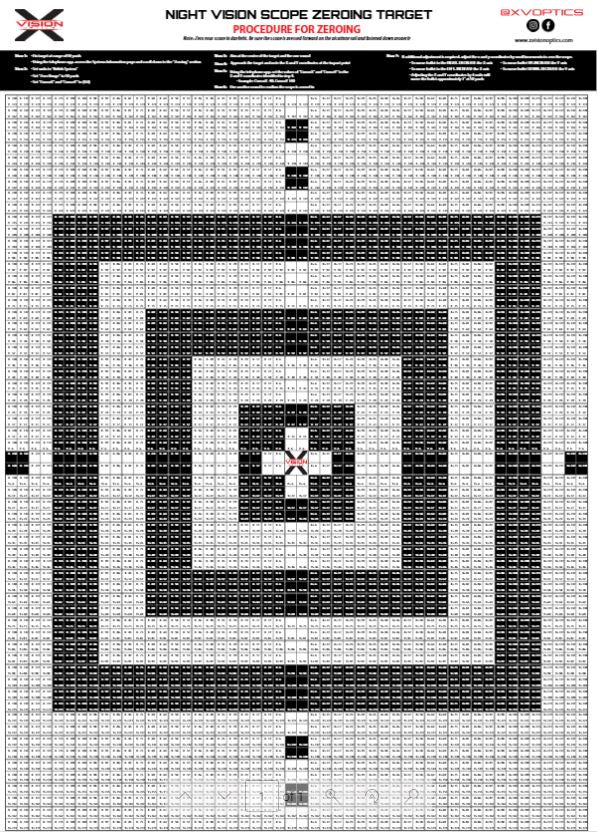
X and Y coordinates are labeled on the zeroing target. To use it, aim the scope’s reticle on the center of the target and fire a round. The bullet is likely to be off target. Inputting the X and Y coordinates of the impact point will help you to correct the bullet placement.
What Does “Zeroing” Mean?
First, you want to fine-tune a scope to ensure that bullets will hit the aiming point at a certain distance. This is called “zeroing” the scope. The KRAD night vision scope comes with a zeroing target for this purpose. So, when you make adjustments during these procedures, the image on the viewscreen shifts relative to the reticle. It is important to note that the reticle remains at the center of the viewscreen. Correspondingly, this affects bullet placement. Zeroing Target
X and Y coordinates are labeled on the zeroing target. To use it, aim the scope’s reticle on the center of the target and fire a round. The bullet is likely to be off target. Inputting the X and Y coordinates of the impact point will help you to correct the bullet placement.
Steps to Follow
- First, put your zeroing target at a range of 50 yards.
- Next, using the smartphone app, access the Control Panel and scroll down to the “Zeroing” section.
- Then, set units to “British System”.
- Next, set “Zero Range” to 50 yards.
- After this, set “Cursor X” and “Cursor Y” to (0,0).
- Next, save setting by tapping “Zeroing Setup” and entering the password 87654321.
- Then, aim at the center of the target and fire one round.
- After this, record the X and Y coordinates at the impact point.
- Using the smartphone app, change the “Cursor X” and “Cursor Y” inputs to match the impact point. (Example: Cursor X -40, Cursor Y 140).
- Next, you want to fire another round to confirm the scope is zeroed in.
- Lastly, if additional adjustment is required, adjust the x and y coordinates by small increments to zero the scope.